Link: Github Repository
Reach me out via LinkedIn, Portfolio Contact Form or mail@pascal-nehlsen.de
![]()
Signs for Trucks
![]()
Table of Contents
Description
Signs for Trucks is an online store to buy pre-designed vinyls with custom lines of letters (often call truck letterings). The store also allows clients to upload their own designs and to customize them on the website as well. Aside from the vinyls that are the main product of the store, clients can also purchase simple lettering vinyls with no truck logo, a fire extinguisher vinyl, and/or a vinyl with only the truck unit number (or another number selected by the client).
Settings
The settings folder inside the trucks_signs_designs folder contains the different setting's configuration for each environment (so far the environments are development, docker testing, and production). Those files are extensions of the base.py file which contains the basic configuration shared among the different environments (for example, the value of the template directory location). In addition, the .env file inside this folder has the environment variables that are mostly sensitive information and should always be configured before use. By default, the environment in use is the decker testing. To change between environments modify the __init.py__ file.
Models
Most of the models do what can be inferred from their name. The following dots are notes about some of the models to make clearer their propose:
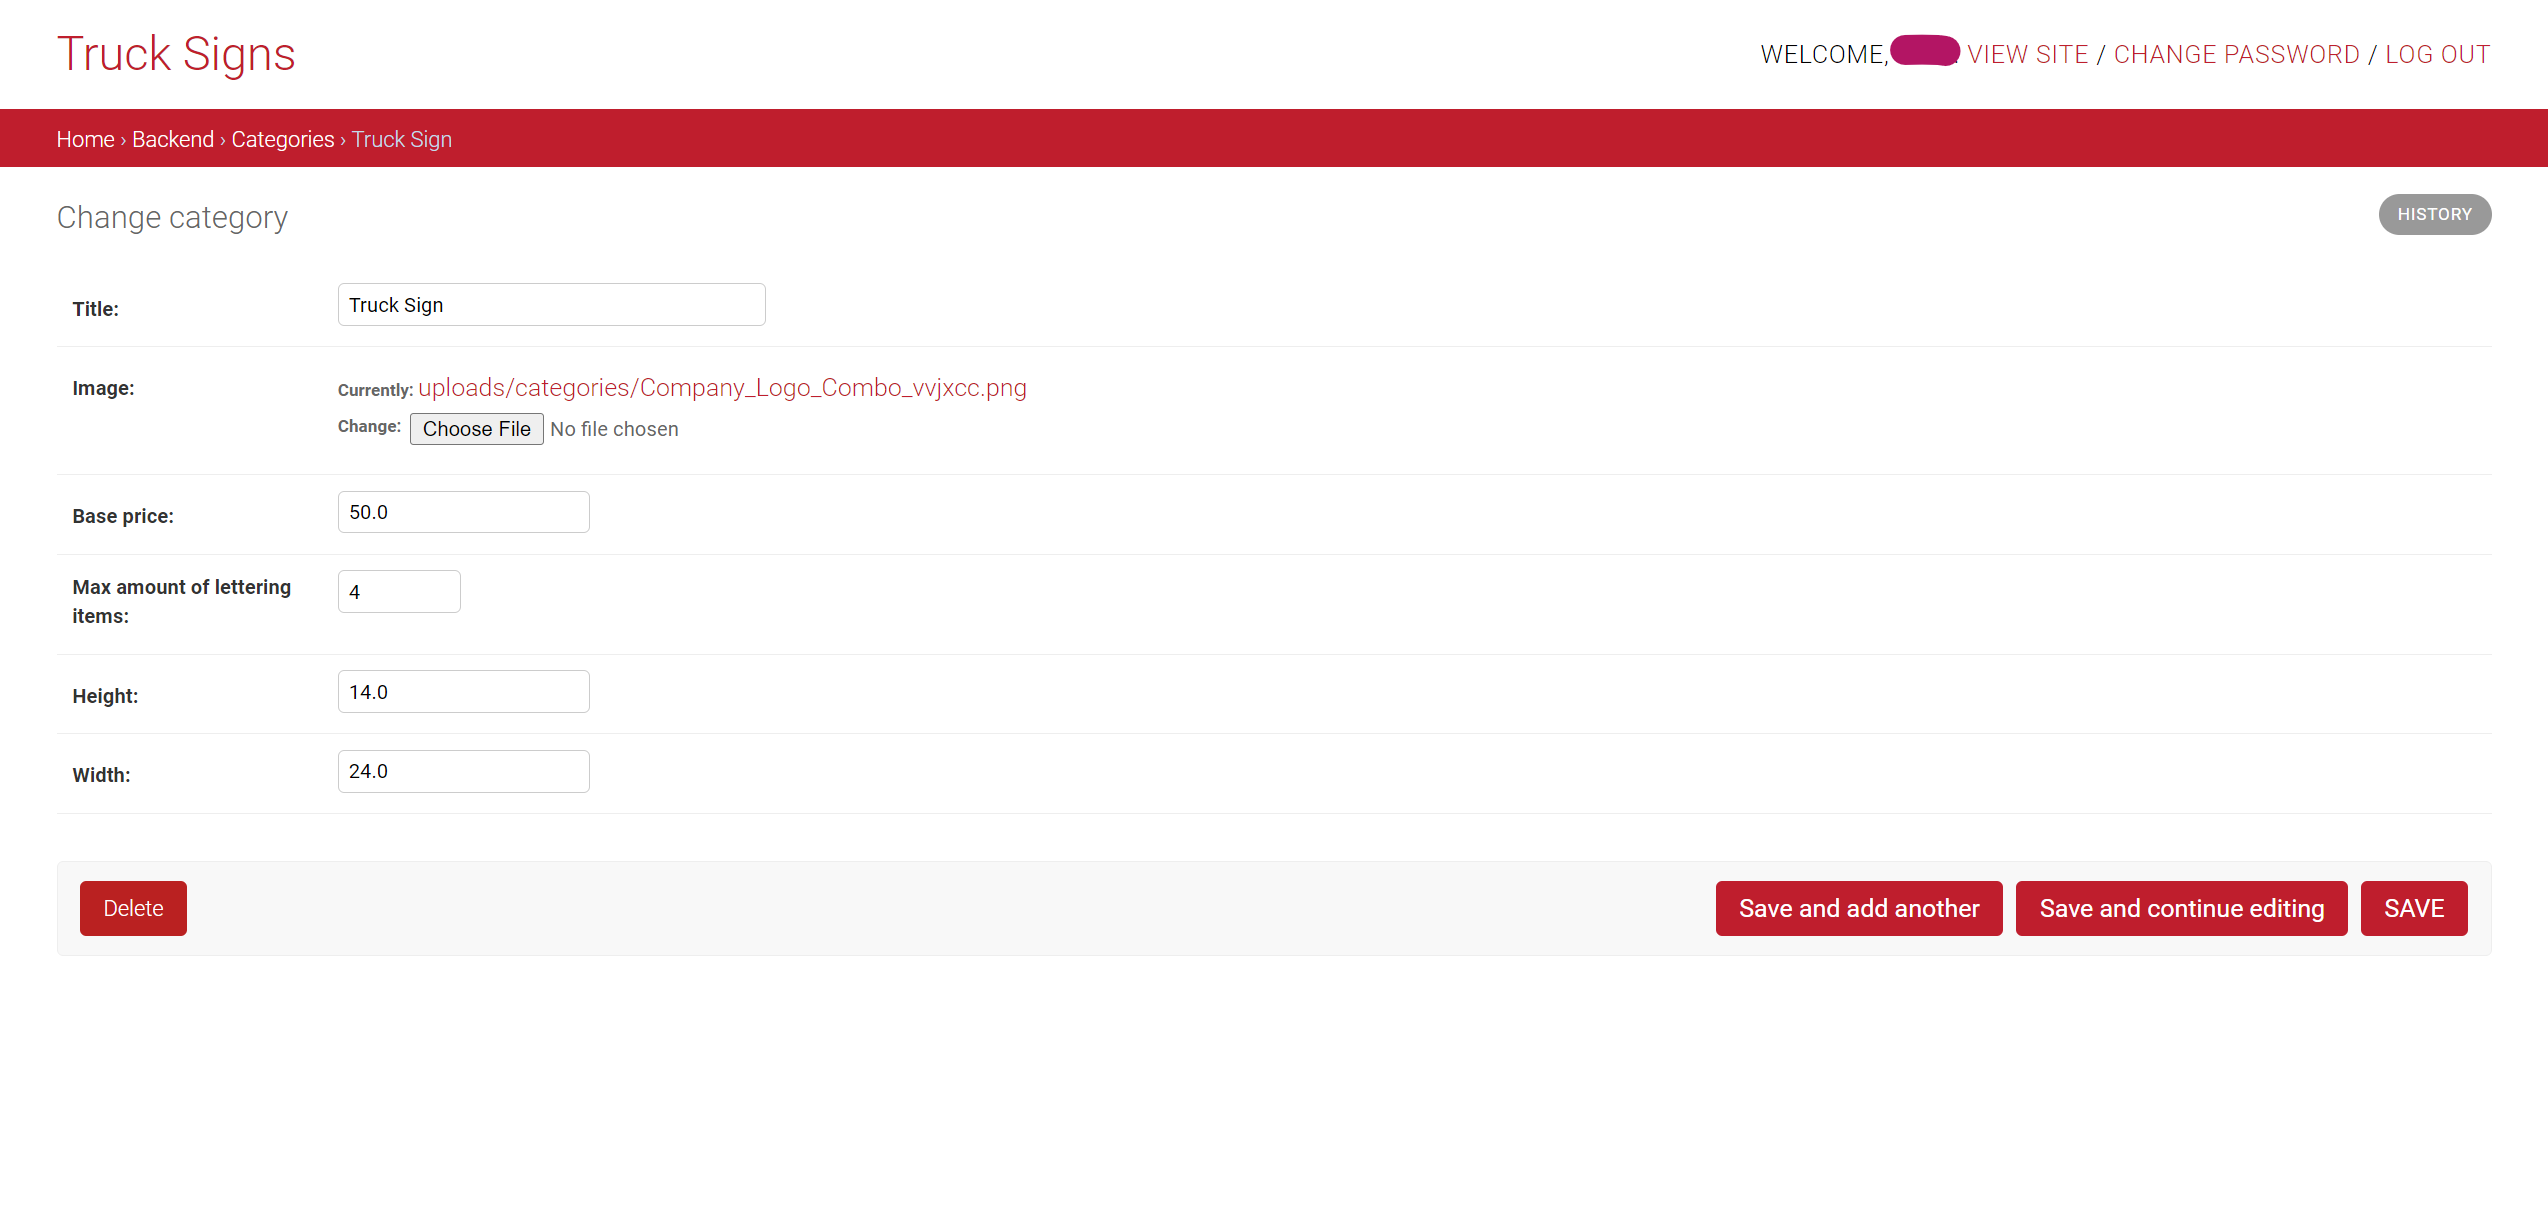
- Category Model: The category of the vinyls in the store. It contains the title of the category as well as the basic properties shared among products that belong to a same category. For example, Truck Logo is a category for all vinyls that has a logo of a truck plus some lines of letterings (note that the vinyls are instances of the model Product). Another category is Fire Extinguisher, that is for all vinyls that has a logo of a fire extinguisher.
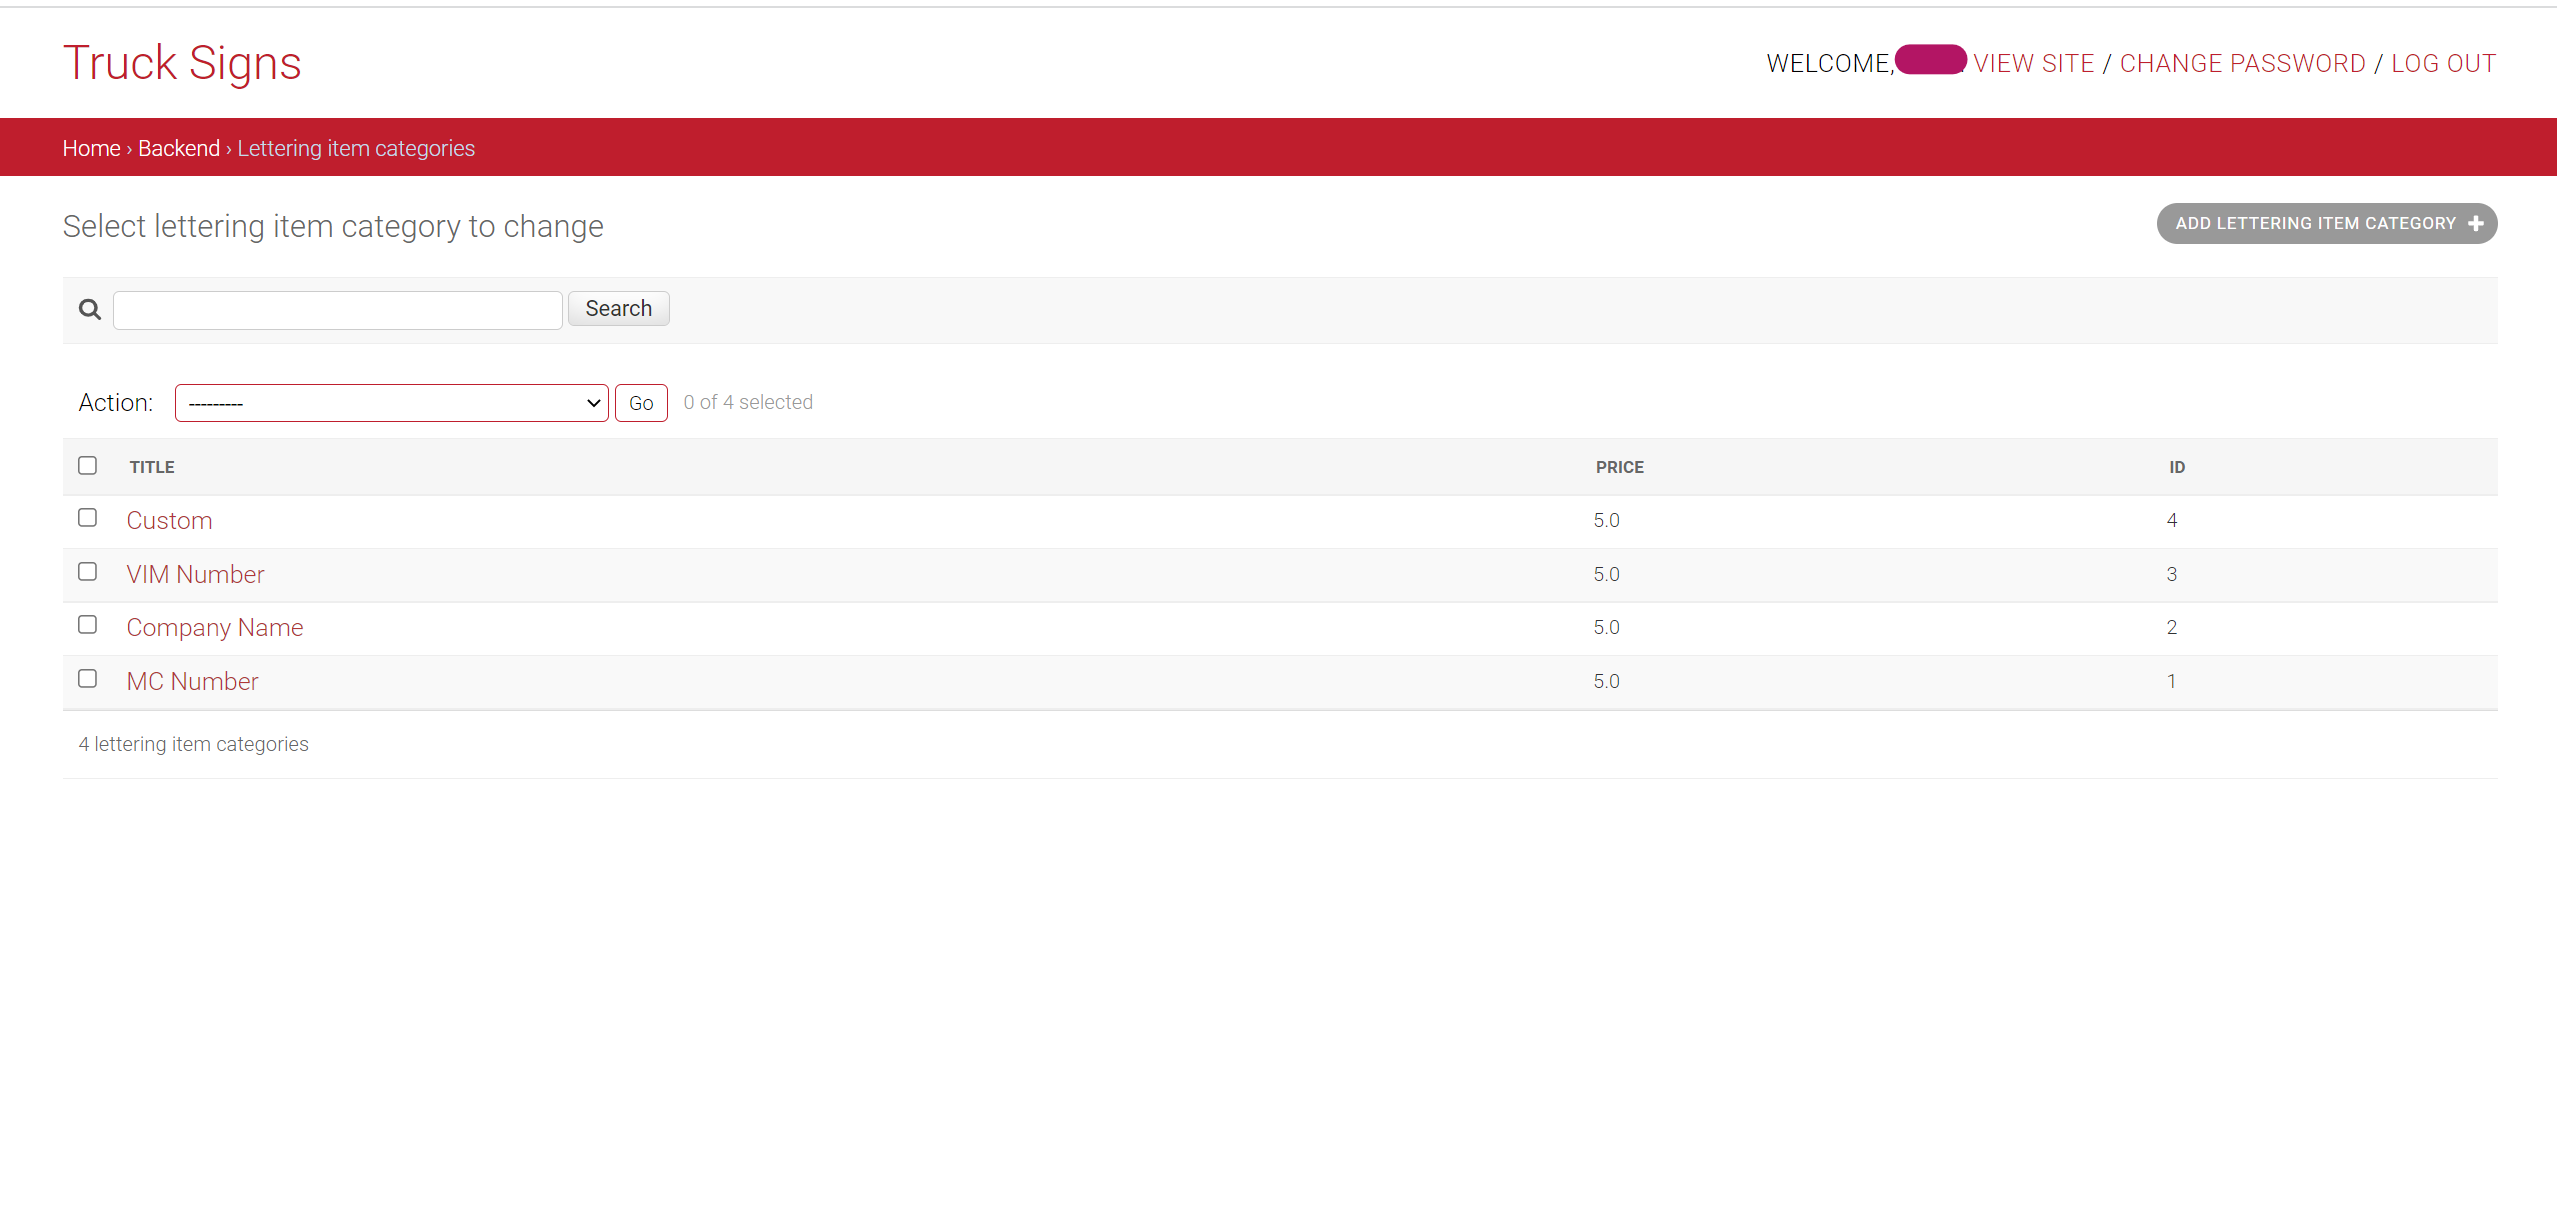
- Lettering Item Category: This is the category of the lettering, for example: Company Name, VIM NUMBER, ... Each has a different pricing.
- Lettering Item Variations: This contains a foreign key to the Lettering Item Category and the text added by the client.
- Product Variation: This model has the original product as a foreign key, plus the lettering lines (instances of the Lettering Item Variations model) added by the client.
- Order: Contains the cart (in this case the cart is just a vinyl as only one product can be purchased each time). It also contains the contact and shipping information of the client.
- Payment: It has the payment information such as the time of the purchase and the client id in Stripe.
To manage the payments, the payment gateway in use is Stripe.
Brief Explanation of the Views
Most of the views are CBV imported from rest_framework.generics, and they allow the backend api to do the basic CRUD operations expected, and so they inherit from the ListAPIView, CreateAPIView, RetrieveAPIView, ..., and so on.
The behavior of some of the views had to be modified to address functionalities such as creation of order and payment, as in this case, for example, both functionalities are implemented in the same view, and so a GenericAPIView was the view from which it inherits. Another example of this is the UploadCustomerImage View that takes the vinyl template uploaded by the clients and creates a new product based on it.
Installation
-
Clone the repo:
git clone <INSERT URL> -
Configure a virtual env and set up the database. See Link for configuring Virtual Environment and Link for Database setup.
-
Configure the environment variables.
-
Copy the content of the example env file that is inside the truck_signs_designs folder into a .env file:
cd truck_signs_designs/settingscp simple_env_config.env .env -
The new .env file should contain all the environment variables necessary to run all the django app in all the environments. However, the only needed variables for the development environment to run are the following:
SECRET_KEY=<secret_key>DB_NAME=<db_name>DB_USER=<db_user>DB_PASSWORD=<dev_db_password>DB_HOST=<localhost>DB_PORT=<5432>STRIPE_PUBLISHABLE_KEY=<stripe_pub_key>STRIPE_SECRET_KEY=<stripe_secret_key>EMAIL_HOST_USER=<your.email@gmail.com>EMAIL_HOST_PASSWORD=<your_password># creating a superuserDJANGO_SUPERUSER_USERNAME=adminDJANGO_SUPERUSER_EMAIL=admin@example.comDJANGO_SUPERUSER_PASSWORD=adminpassword -
For the database, the default configurations should be:
DB_NAME=trucksigns_dbDB_USER=trucksigns_userDB_PASSWORD=supertrucksignsuser!DB_HOST=localhostDB_PORT=5432 -
The SECRET_KEY is the django secret key. To generate a new one see: Stackoverflow Link
-
NOTE: not required for exercise
The STRIPE_PUBLISHABLE_KEY and the STRIPE_SECRET_KEY can be obtained from a developer account in Stripe.- To retrieve the keys from a Stripe developer account follow the next instructions:
- Log in into your Stripe developer account (stripe.com) or create a new one (stripe.com > Sign Up). This should redirect to the account's Dashboard.
- Go to Developer > API Keys, and copy both the Publishable Key and the Secret Key.
- To retrieve the keys from a Stripe developer account follow the next instructions:
-
The EMAIL_HOST_USER and the EMAIL_HOST_PASSWORD are the credentials to send emails from the website when a client makes a purchase. This is currently disable, but the code to activate this can be found in views.py in the create order view as comments. Therefore, any valid email and password will work.
-
-
Run the migrations and then the app:
python manage.py migratepython manage.py runserver -
Congratulations =) !!! The App should be running in localhost:8000
-
(Optional step) To create a super user run:
python manage.py createsuperuser
Usage
-
Create a Dockerfile on root Level
-
Create Docker image
docker build -t <image-name>:<tag-name> .-t: Stands for "tag." Used to name and optionally tag the image in the format<image-name>:<tag-name>..: Represents the current directory, which contains the Dockerfile and the context for building the image.
-
Create a network
docker network create <network-name><network-name>: The name you want to assign to the new network. This name must be unique within the Docker environment.- The database and the Docker Container can communicate in this network.
-
Start the postgres container
docker run --name <docker-name> \--network <networkname> \-e POSTGRES_PASSWORD=<postgres-password> \-e POSTGRES_USER=<postgres-user> \-e POSTGRES_DB=<postgres-db-name> \-v <postgres-volume>:/var/lib/postgresql/data \ #store the postgres data in a volume-d postgres<network-name>: The network you created before.- Postgres Data: The login data you created before.
-
Start the Docker container
docker run --name <container-name> \--network <network-name> \-p 8020:8000 \-v <media-volume>:/app/media \-v <static-volume>:/app/static \--restart on-failure \<image-name>:<image-tag><network-name>: The same network as your postgres container- This container listens on Port 8020
--restart on-failure: Configures the container to restart automatically due to an error.<image-name>:<image-tag>: Your image name due the build process.
NOTE: To create Truck vinyls with Truck logos in them, first create the Category Truck Sign, and then the Product (can have any name). This is to make sure the frontend retrieves the Truck vinyls for display in the Product Grid as it only fetches the products of the category Truck Sign.
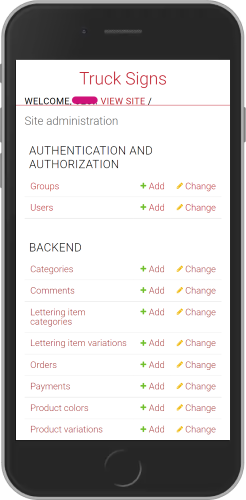
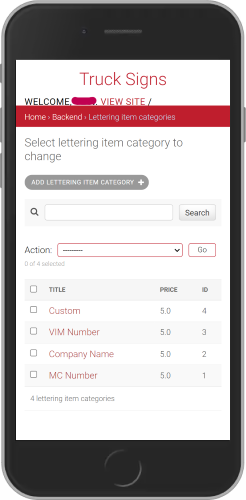
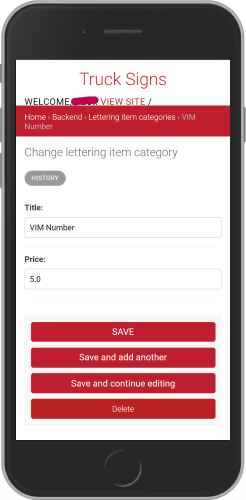
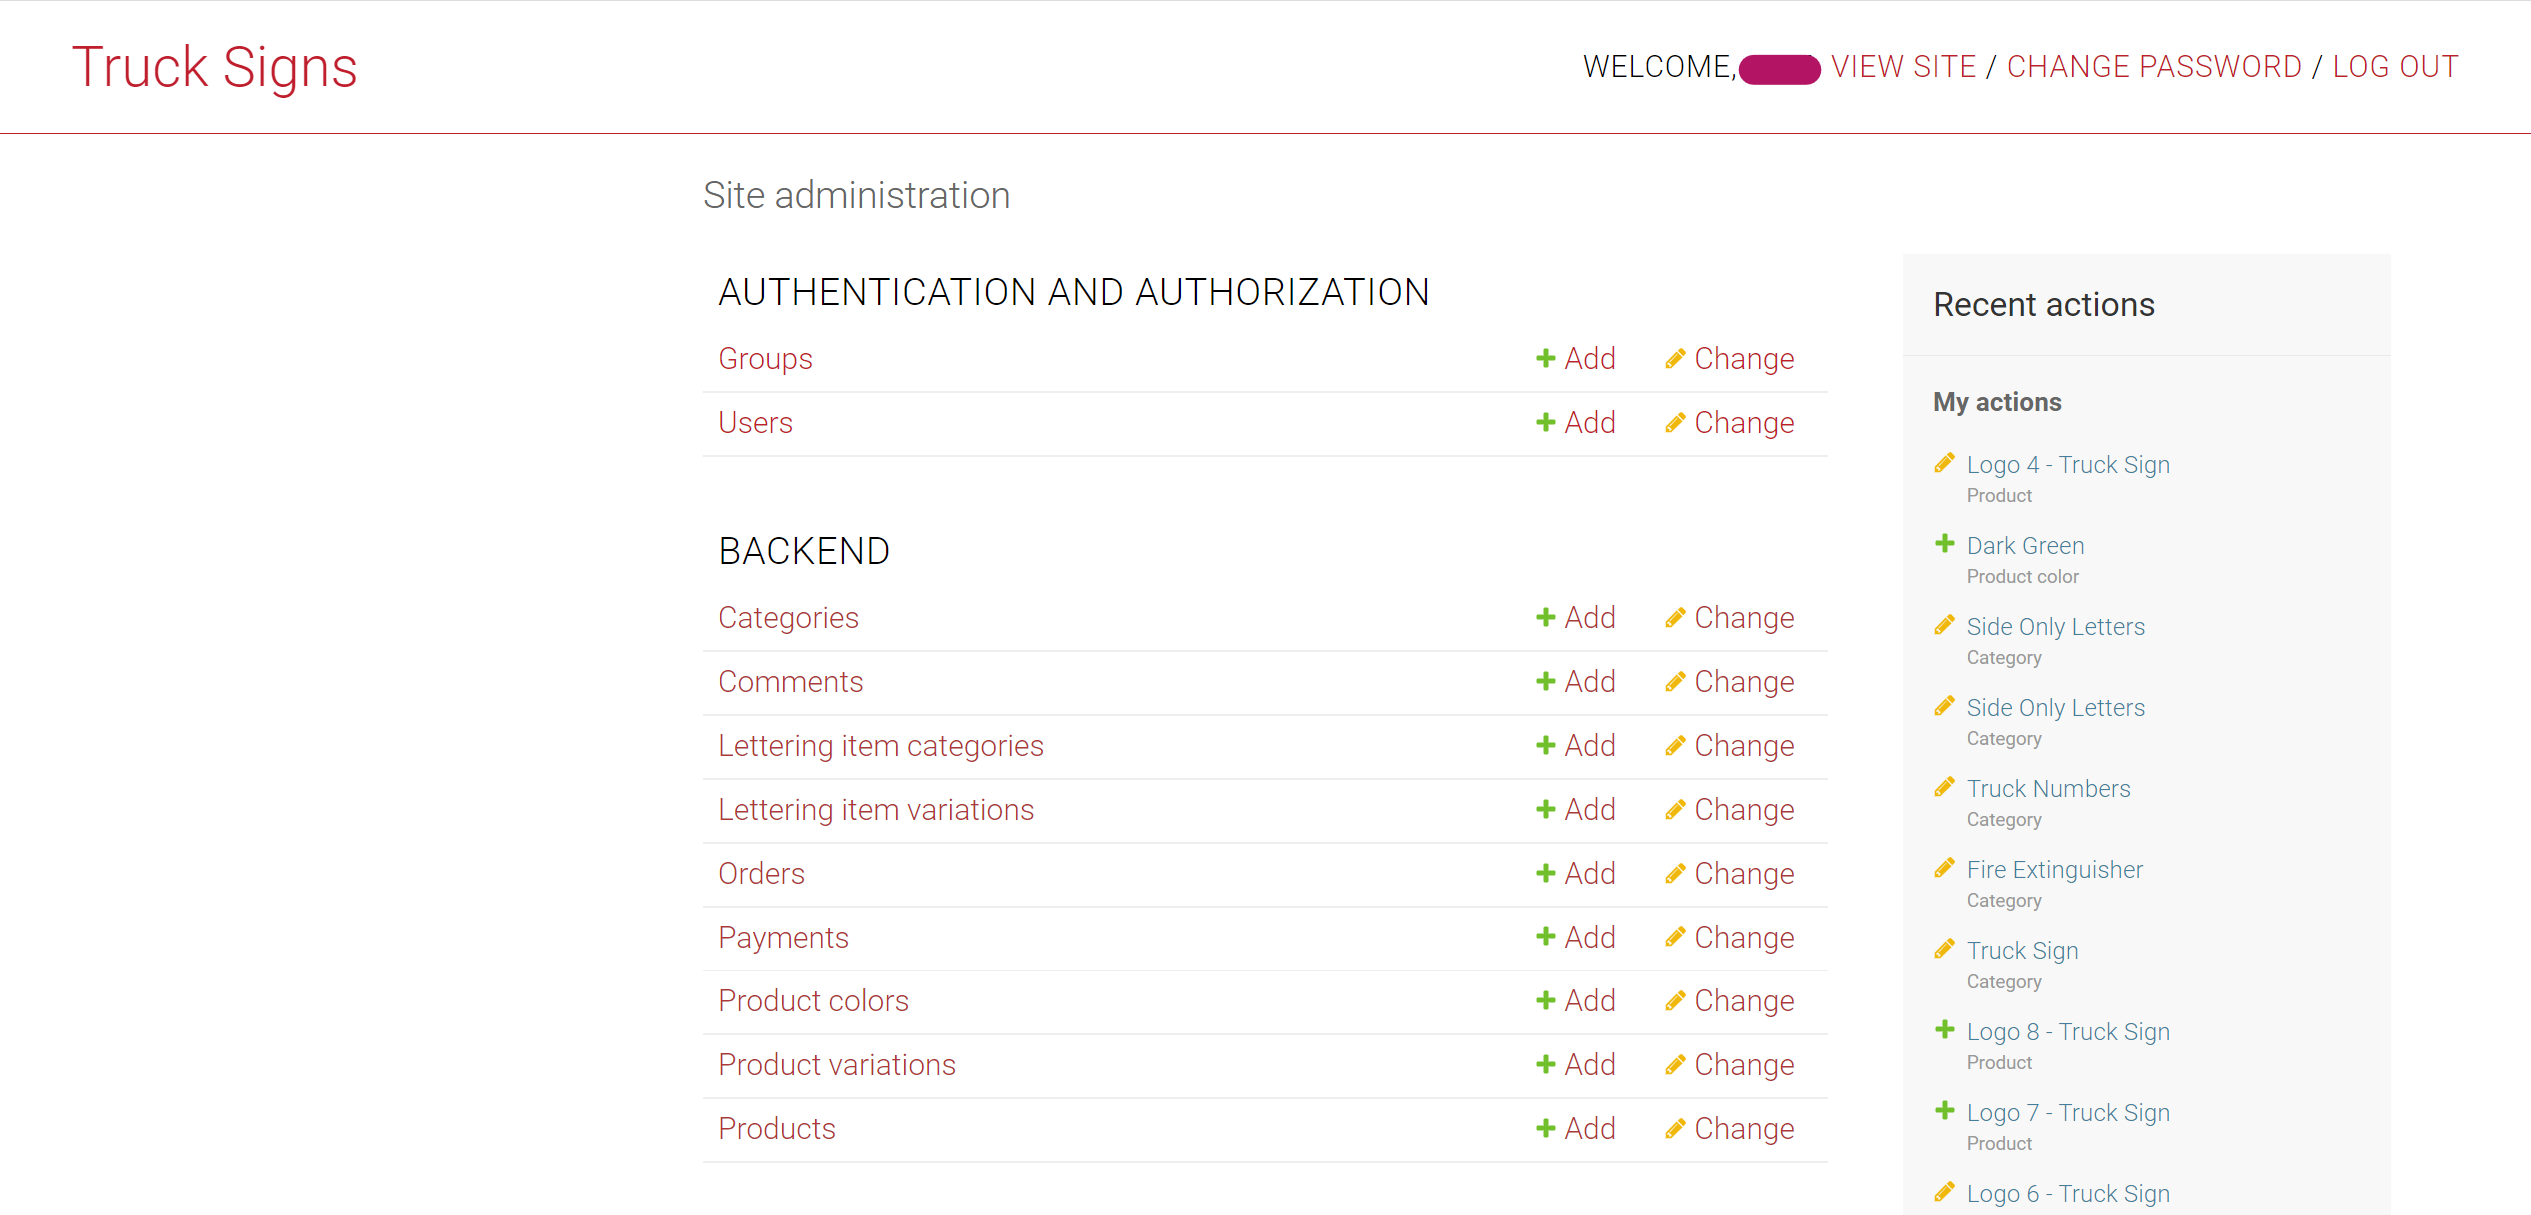
Screenshots of the Django Backend Admin Panel
Mobile View
Desktop View
Useful Links
Postgresql Database
- Setup Database: Digital Ocean Link for Django Deployment on VPS
Docker
- Docker Oficial Documentation
- Dockerizing Django, PostgreSQL, guinicorn, and Nginx:
Django and DRF
- Django Official Documentation
- Generate a new secret key: Stackoverflow Link
- Modify the Django Admin:
- Small modifications (add searching, columns, ...): Link
- Modify Templates and css: Link from Medium
- Django Rest Framework Official Documentation
- More about Nested Serializers: Stackoverflow Link
- More about GenericViews: Testdriver.io Link
Miscellaneous
- Create Virual Environment with Virtualenv and Virtualenvwrapper: Link
- Configure CORS
- Setup Django with Cloudinary